
| Home | My IMVU Homepage | Tutorials | |
Making a Pearl with
GIMP
|
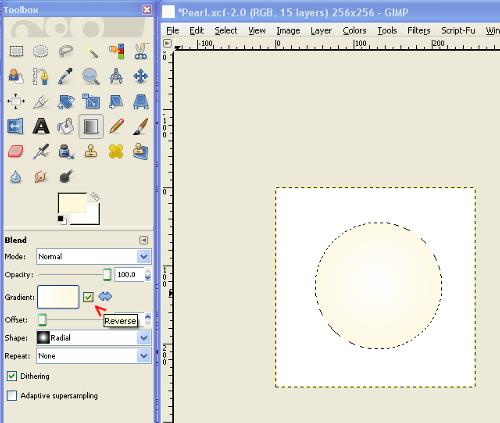 |
1. Create a circle using the ellipse select tool. 2. Choose your foreground color to be the color you want the pearl to be. I used "Cornsilk" hex #fff8dc). | |
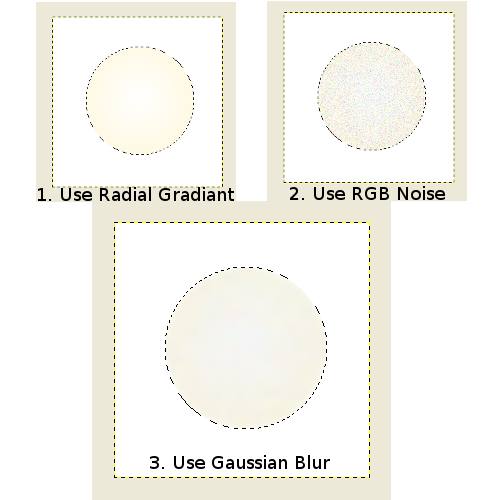 |
3. Use a radial gradient fill with the "reverse" option area checked. Start your fill from the center of your circle and go to the side (or up or down...it will look the same). Leave the ellipse area selected as you'll need it for a few more steps. Make a duplicate of this layer (your first layer will act as a background...otherwise you'll end up with a pearl that has transparent edges). 4. Go to Filters > Noise > RGB Noise. You can leave the settings as is. Or play around with them so one color dominates the noise you are creating. I set mine to Red 0.20 Green 0.20 Blue 0.30. Go to Filters > Blur > Gausian Blur. Put the Horizontal and Vertical radius at 14 or whatever you like. (Leaving the ellipse area selected will keep the Guassian Blur contrained within the circle.) | |
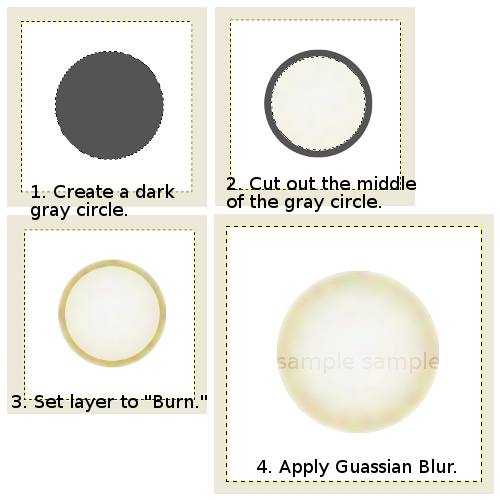 |
5. With your ellipse circle still selected create a new layer and fill the circle with with a dark gray. Use the ellipse tool to make a smaller circle in the center of the gray circle. Press the delete key on the keyboard. And press SHIFT+CTRL A to remove the selection. Set the layer for the gray circle to "Burn". Then go to Filters > Blur > Gausian Blur. I put the Horizontal and Vertical radius at 40. But you can choose whatever you feel works best. | |
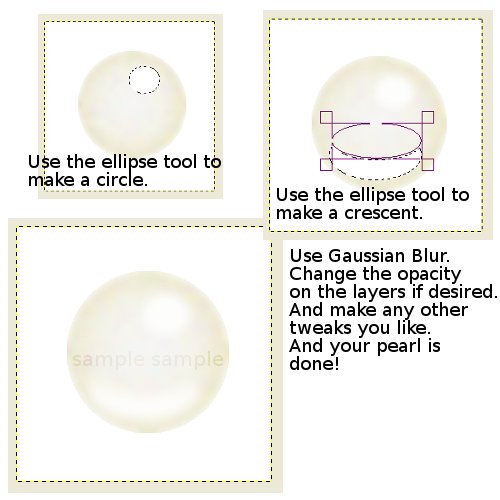 |
6. Create a new layer. Use the ellipse tool to make a smaller circle to serve as a highlight and place it on the pearl where you choose. Fill it with white. Press SHIFT+CTRL A to remove the selection. Apply Gausian Blur to the highlight circle. (I had my settings at 14 radius.) 7. Create another new layer. Use the ellipse tool to make an oval shape towards the bottom of the "pearl." While pressing CTRL create another ellipse shape so it overlaps the first oval you made a little. This will create a sort of "moon shape." Fill the shape with white. Highlights could also be created using the paintbrush and painting them on. And use the Smudge Tool or Guassian Blur. This could create more irregular highlights that might look more realistic. You could also change the opacity of the layers to help achieve the look you desire. |